

How To Make It So You Need To Collect Items To Play An Animation In Unity
Creating a new Blitheness Clip
Using the Animation view
The Animation view is used to preview and edit Animation Clips Animation data that can be used for animated characters or simple animations. It is a simple "unit" piece of motility, such as (one specific instance of) "Idle", "Walk" or "Run". More info
See in Glossary for animated GameObjects The fundamental object in Unity scenes, which can represent characters, props, scenery, cameras, waypoints, and more. A GameObject's functionality is divers past the Components fastened to information technology. More info
Encounter in Glossary in Unity. To open the Blitheness view in Unity, become to Window > Animation.
Viewing Animations on a GameObject
The Animation window is linked with with the Bureaucracy window, the Project window A window that shows the contents of your Assets folder (Projection tab) More info
Run across in Glossary , the Scene A Scene contains the environments and menus of your game. Think of each unique Scene file as a unique level. In each Scene, y'all place your environments, obstacles, and decorations, essentially designing and building your game in pieces. More info
See in Glossary view, and the Inspector A Unity window that displays data about the currently selected GameObject, asset or project settings, allowing you to inspect and edit the values. More info
Come across in Glossary window. Similar the Inspector, the Animation window shows the timeline and keyframes of the Blitheness for the currently selected GameObject or Blitheness Clip Nugget. You tin select a GameObject using the Hierarchy window or the Scene View An interactive view into the earth you are creating. Yous use the Scene View to select and position scenery, characters, cameras, lights, and all other types of Game Object. More info
Come across in Glossary , or select an Animation Clip Asset using the Project Window.
The Blithe Backdrop list
In the image beneath, the Blitheness view (left) shows the Blitheness used by the currently selected GameObject, and its child GameObjects if they are as well controlled by this Animation. The Scene view and Bureaucracy view are on the right, demonstrating that the Animation view shows the Animations attached to the currently selected GameObject.
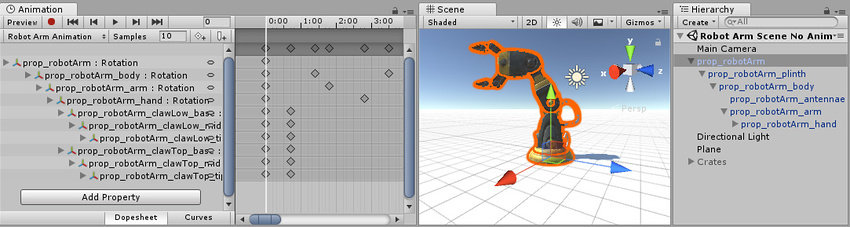
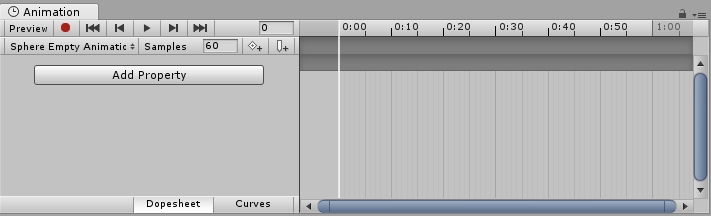
In the left side of the Animation view is a list of the animated properties. In a newly created prune where no animation has nonetheless been recorded, this list is empty.
When you brainstorm to breathing various backdrop inside this clip, the animated properties will announced hither. If the animation controls multiple child objects, the listing will too include hierarchical sub-lists of each kid object's animated backdrop. In the example above, various parts of the Robot Arm's GameObject hierarchy are all animated within the same animation prune.
When animative a hierarchy of GameObjects inside a unmarried clip like this, make sure you create the Blitheness on the root GameObject in the hierarchy.
Each property can be folded and unfolded to reveal the exact values recorded at each keyframe. The value fields show the interpolated value if the playback head (the white line) is between keyframes. You tin can edit these fields directly. If changes are made when the playback caput is over a keyframe, the keyframe'south values are modified. If changes are made when the playback head is between keyframes (and therefore the value shown is an interpolated value), a new keyframe is created at that point with the new value that yous entered.

The Animation Timeline
On the right side of the Animation View is the timeline for the current clip. The keyframes for each animated belongings appear in this timeline. The timeline view has ii modes, Dopesheet and Curves. To toggle betwixt these modes, click Dopesheet or Curve at the bottom of the animated belongings listing area:

These offer ii alternating views of the Animation timeline and keyframe data.
Dopesheet timeline manner
Dopesheet mode offers a more meaty view, assuasive you to view each belongings's keyframe sequence in an individual horizontal rail. This allows y'all to view a simple overview of the keyframe timing for multiple properties or GameObjects.

See documentation on Key manipulation in Dopesheet way for more information.
Curves timeline style
Curves fashion displays a resizable graph containing a view of how the values for each animated belongings changes over time. All selected properties appear overlaid within the same graph view. This fashion allows you to have great control over viewing and editing the values, and how they are interpolated between.

Fitting your selection to the window
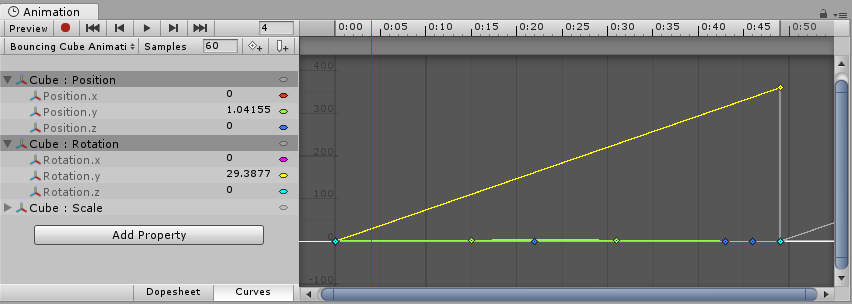
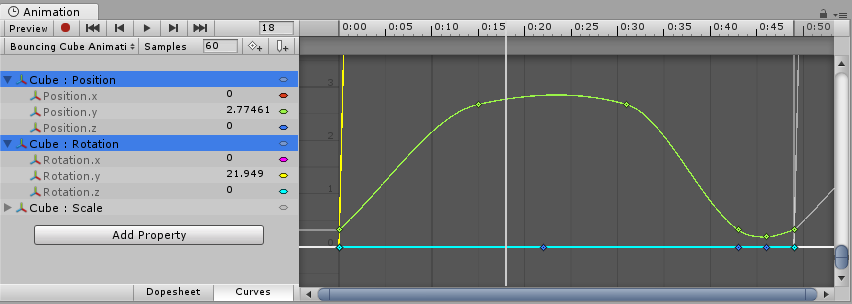
When using Curves mode to view your Animation, it's of import to understand that sometimes the various ranges for each property tin can differ greatly. For example, consider a simple Animation clip for a spinning bouncing cube. The billowy Y position value may vary between the range 0 to ii (meaning the cube bounces 2 units high during the blitheness); however, the rotation value goes from 0 to 360 (representing its degrees of rotation). When viewing these two curves at the same time, the animation curves Allows you to add together information to an imported clip then you tin animate the timings of other items based on the country of an animator. For example, for a game set in icy conditions, you could utilize an extra animation curve to control the emission rate of a particle system to show the actor's condensing breath in the cold air. More info
See in Glossary for the position values will be very hard to brand out considering the view will be zoomed out to fit the 0–360 range of the rotation values within the window:
Press F on the keyboard to zoom the view to the currently selected keyframes. This is useful equally a quick way to focus and re-scale the window on a portion of your Blitheness timeline for easier editing.
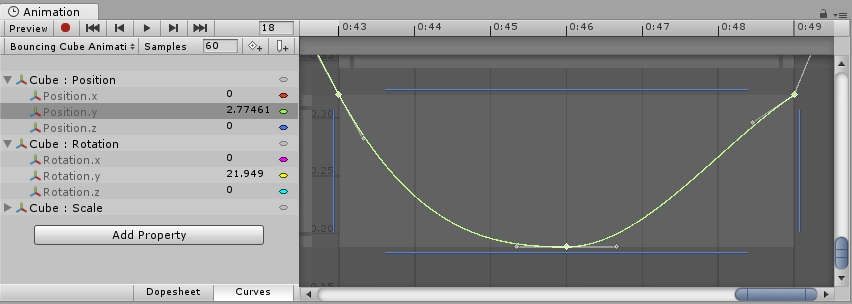
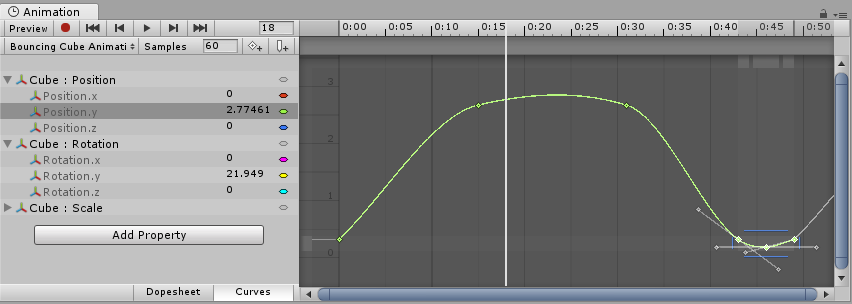
Click on individual properties in the list and press F on the keyboard to automatically re-calibration the view to fit the range for that value. You can also manually arrange the zoom of the Curves window by using the drag handles at each end of the view's scrollbar sliders. In the image below, the Animation Window is zoomed in to view the billowy Y position Blitheness. The start of the xanthous rotation curve is notwithstanding visible, but now extends way off the acme of the view:
Press A on the keyboard to fit and re-scale the window to show all the keyframes in the prune, regardless of which ones are selected. This is useful if you want to view the whole timeline while preserving your electric current selection:
Playback and frame navigation controls
To control playback of the Blitheness Clip, utilise the Playback Controls at the top left of Blitheness view.

From left-to-right, these controls are:
- Preview fashion (toggle on/off)
- Record manner (toggle on/off) Note: Preview mode is always on if record mode is on
- Move playback head to the kickoff of the clip
- Movement playback head to the previous keyframe
- Play Blitheness
- Move playback caput to the next keyframe
- Motion playback caput to the terminate of the clip
Yous tin can besides command the playback caput using the following keyboard shortcuts:
- Press Comma (,) to go to the previous frame.
- Press Menstruation (.) to go to the next frame.
- Hold Alt and press Comma (,) to go to the previous keyframe A frame that marks the starting time or finish bespeak of a transition in an animation. Frames in between the keyframes are chosen inbetweens.
Meet in Glossary . - Hold Alt and press Period (.) to get to the next keyframe.
Locking the window
You tin lock the Animation editor window and then that it does non automatically switch to reverberate the currently selected GameObject in the Hierarchy or Scene. Locking the window is useful if you want to focus on the Animation for i item GameObject, and still exist able to select and dispense other GameObjects in the Scene.

To larn more well-nigh navigating the Bend view, see documentation on Using Animation Curves.
- 2017–09–05 Page amended
Creating a new Animation Clip
Source: https://docs.unity3d.com/Manual/animeditor-UsingAnimationEditor.html
Posted by: warfieldpasters.blogspot.com
0 Response to "How To Make It So You Need To Collect Items To Play An Animation In Unity"
Post a Comment